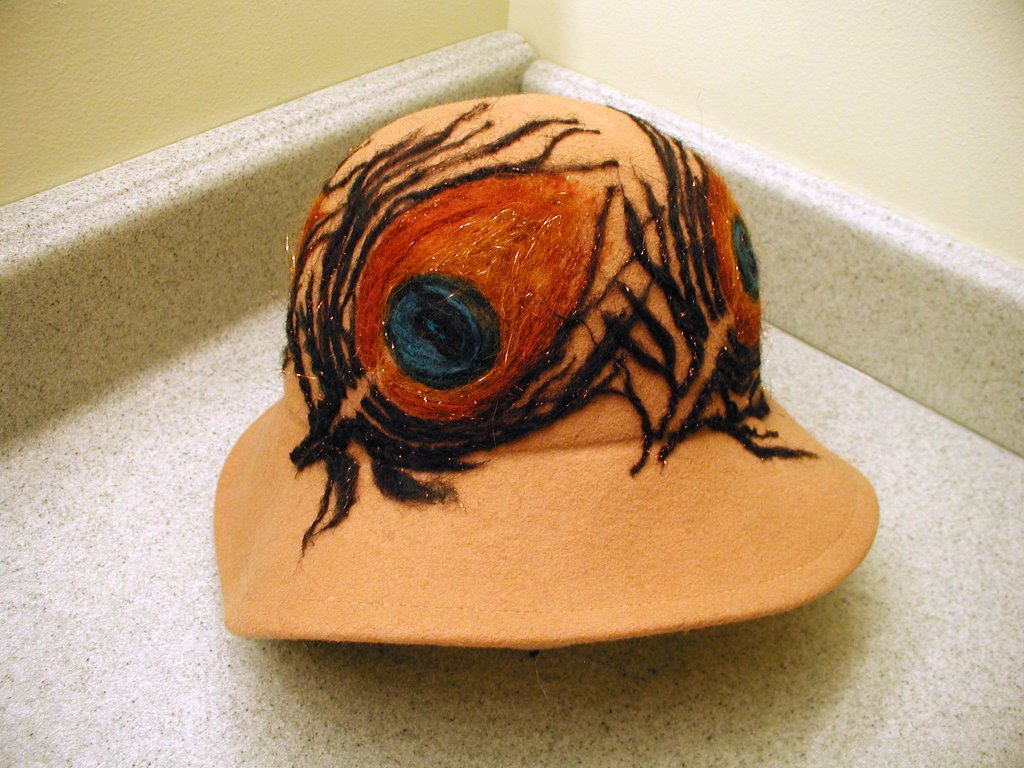
 This is my first time actually trying to enter Whiplash. I'm not sure if which ring of the competition to throw it into. It's also my first attempt at a needle felting tutorial. The first step, of course, was to obtain a hat. This one was a $1 find at my local thrift shop. The hat was in mostly good condition but had a minor stain and a couple of small holes, presumably from someone attaching a pin to decorate the hat. For my purposes, none of those defects really mattered. (Unfortunately, I neglected to take any pictures of the hat before I started embellishing.)
 After figuring out what motif I wanted to use to decorate my thriftshop find, I located the defects on the hat that I wanted to hide. I sketched my design onto the hat using chalk, placing the eyes of the peacock feathers over the holes that I wanted to felt over. I selected colors of corriedale roving needed to complete my design and began filling in the eyes of the feathers as though coloring a paint by number. I found that the chalk outlines disappeared rather quickly once I started the actual felting process. That didn't really matter much, however, because the lines were only intended as a guide for placement of the eyes and the rest of the feather was built more or less free-form around the eyes.
 Once the eyes were finished, I decided that the hat needed a bit more glitz. for the remainder of the feathers, angelina fibers were carded into the roving to add sparkle to the finished project. This picture shows the hat with the blended rolags of the two brownish tones that I selected for the tops of the feathers. In the foreground you can see the clover multi-needle punch and a single needle that I used to attach the fiber to the hat. For tacking fibers in place, I generally keep one or two felting needles in each size with a self-adhesive label wrapped around the top. On this lable, I can write the size and shape of the needle so that I can tell at a glance which needle I'm reaching for. Many manufacturers color code their felting needles, but I can never seem to remember which color corresponds to which size/shape.
 I also selected several colors from the eye of the feather and carded them together with the angelina fibers for the "fronds" of the feathers. I hoped that by blending the colors, I would be able to mimic the irridescence of the play of colors on the feathers. To make the fronds, I started by pulling out thin tufts of the blended fiber and rolling it between my hands to make a thin snake. I then arranged those snakes into the pattern that I wanted. After some experimentation, I also found that I could spin (I needed the practice drafting on my spinning wheel) a thick/thin single which I could then pull apart in the lengths that I wanted. Since my spinning is still a bit rough, the overtwisted lengths of fiber kinked back on themselves in a way that I found pleasing and felt contributed to the overall design.
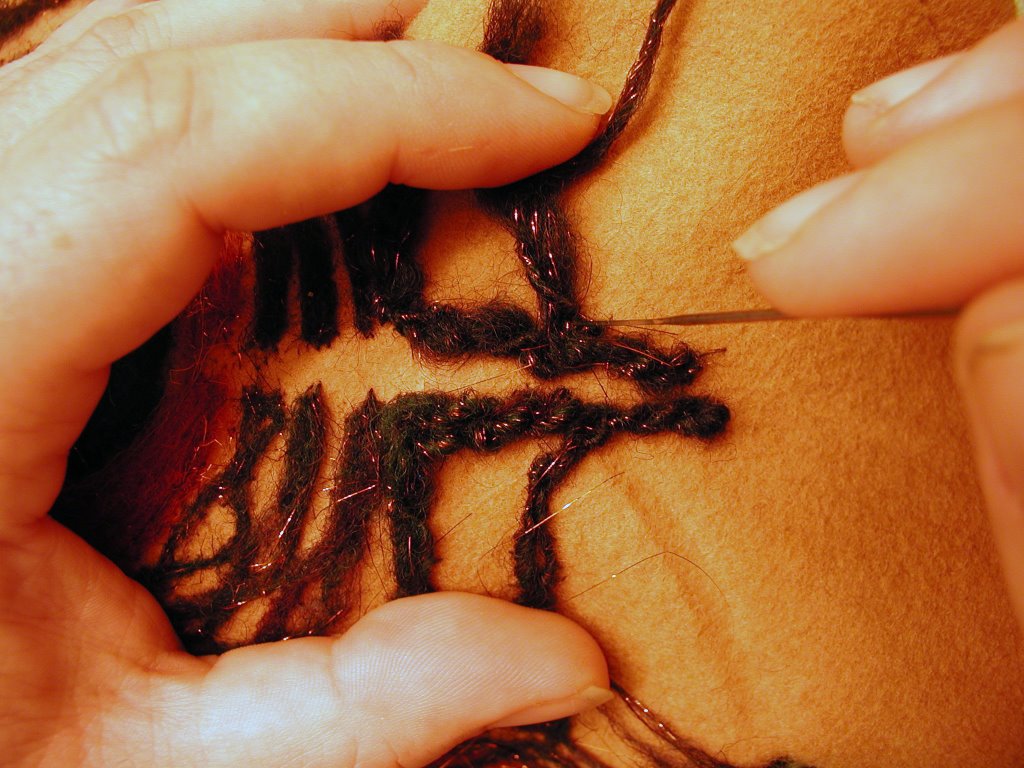 For those not familiar with needle felt embellishment, you begin by arranging the fibers onto the base fabric. It's a little like painting with the fiber. Once you're pleased with the arrangement of your colored fibers, you tack them into place with a single needle. A felting needle is very sharp and usually has either a triangular or "star" shaped cross-section. This cross section creates "blades" on the needle which have tiny barbs arranged along their length. The barbs grab the fiber and push them through the base fabric. To use the needles, you support your base fabric on a block of foam and push the needle through the fiber and base fabric into the foam pushing the loose fibers through at the same time. For this hat, I found that a "Nerf" football followed the contour of the crown of the hat better than the block foam that I had been using and I was able to work much more effectively without jabbing myself in the fingers with the needle as often as I had done with the square block.
From this point, the entire process can be done either with the single needle, or with a variety of multi-needle punches. The punches certainly make the process go much more quickly.
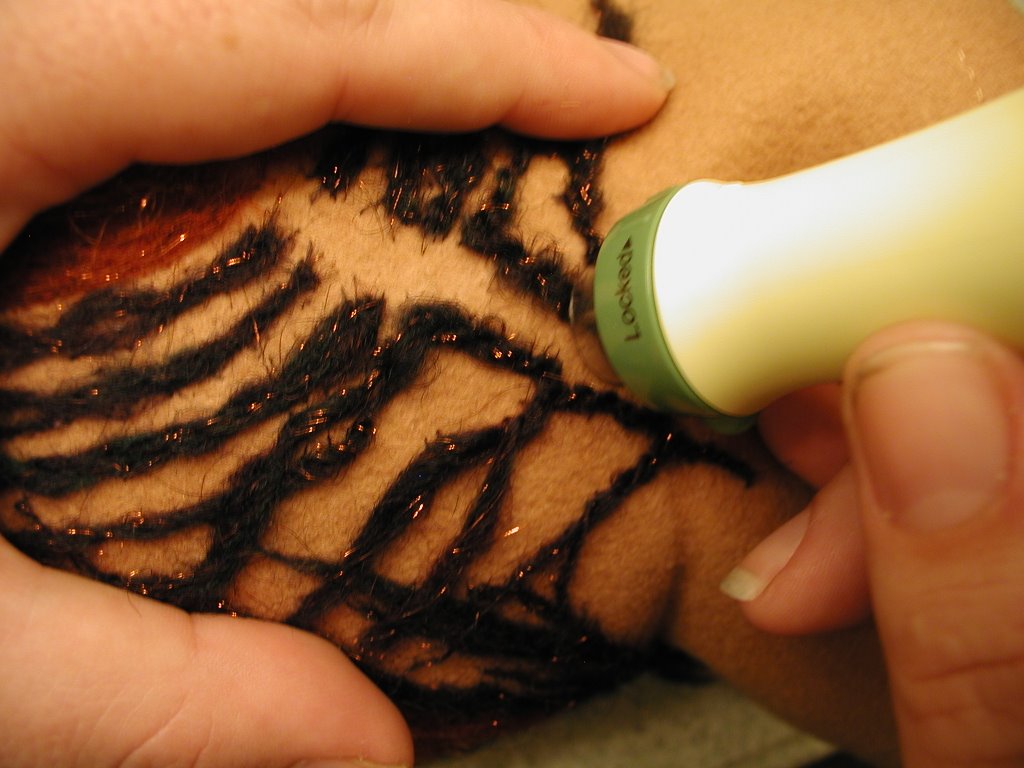 My current favorite punch is the clover multi-needle punch. It holds 5 needles and has a plastic guard which locks when the punch is not in use. The guard also protects your fingers so that you don't perforate them while you work. Once the fibers have been tacked down, the punch makes the actual work of securing the fiber to the base fabric go much, much more quickly.


4 comments:
Great hat! I think you did capture that irridescent flash, so pretty! Awesome job!
Thank you so much for the comments. I loved working on that hat so much that I've been contemplating a hat form for needle felting. I have another cool thriftshop hat that I plan on embellishing. This one is ethinic and really, really scratchy. I think that the first thing that I'll do is needle felt a marino lining so that it is more comfortable to wear. I will certainly be working on more hats... I'm combing the local thrift shops looking for raw materials.
oh gosh this is so lovely! thank you for sharing this idea, now i have yet ANOTHER craft to try!
The needle felt embellishments must add an interesting texture and dimension to the hat.
Post a Comment