16 October 2006

Just Playing Around

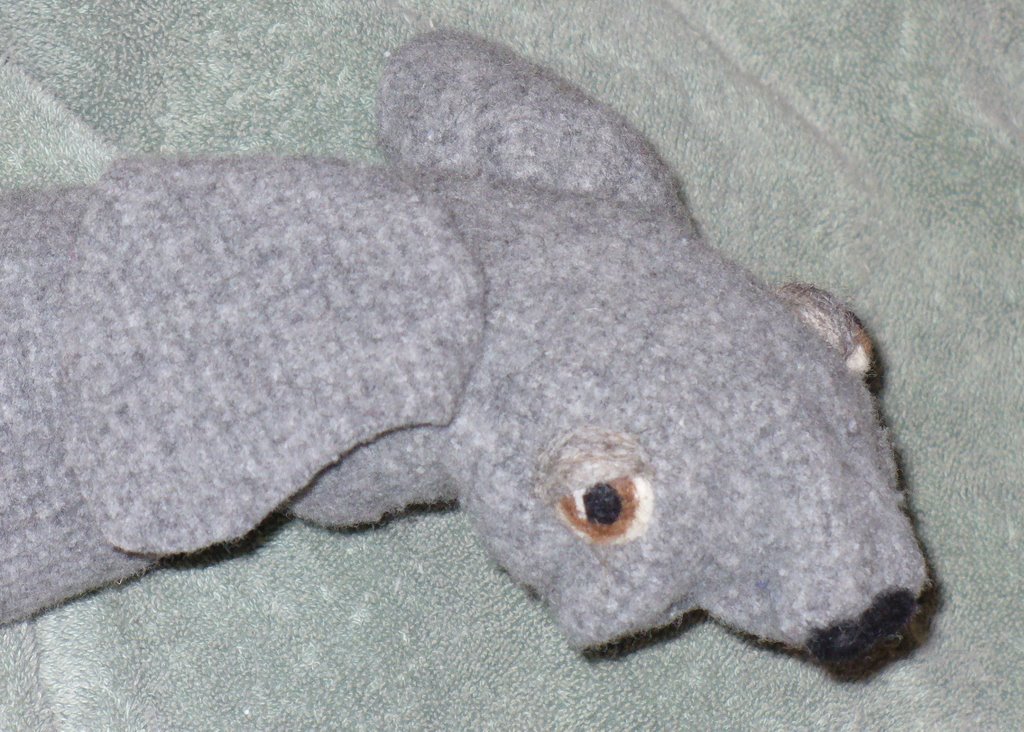
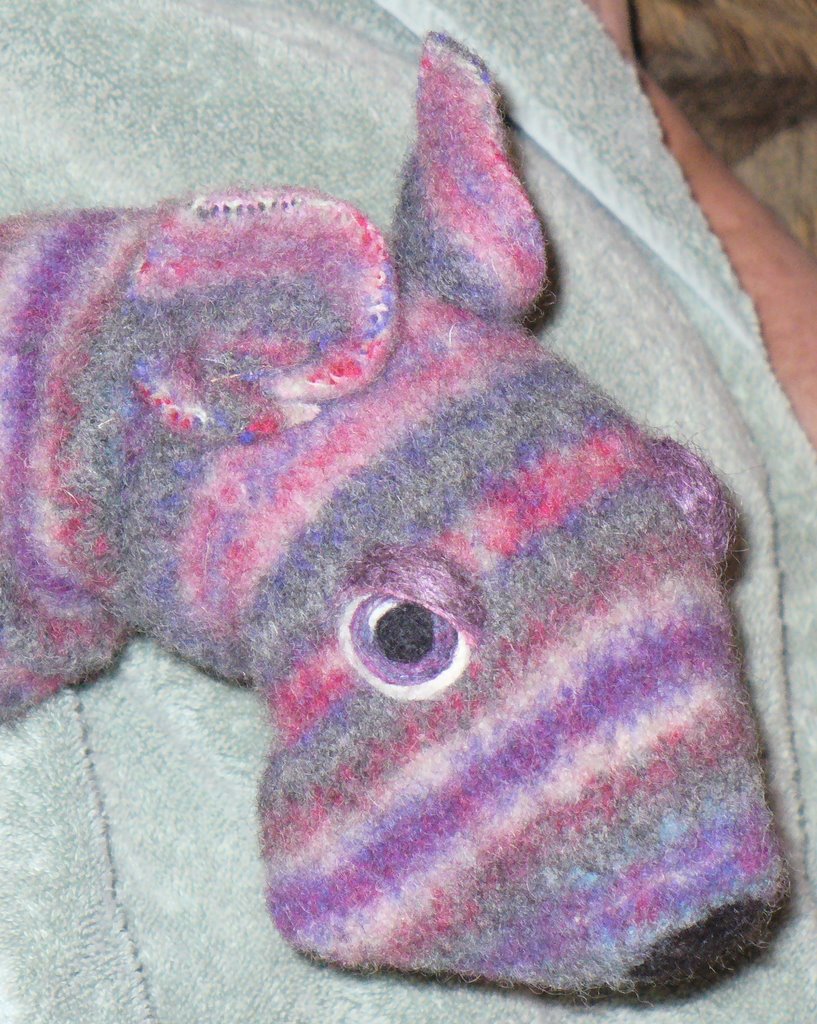
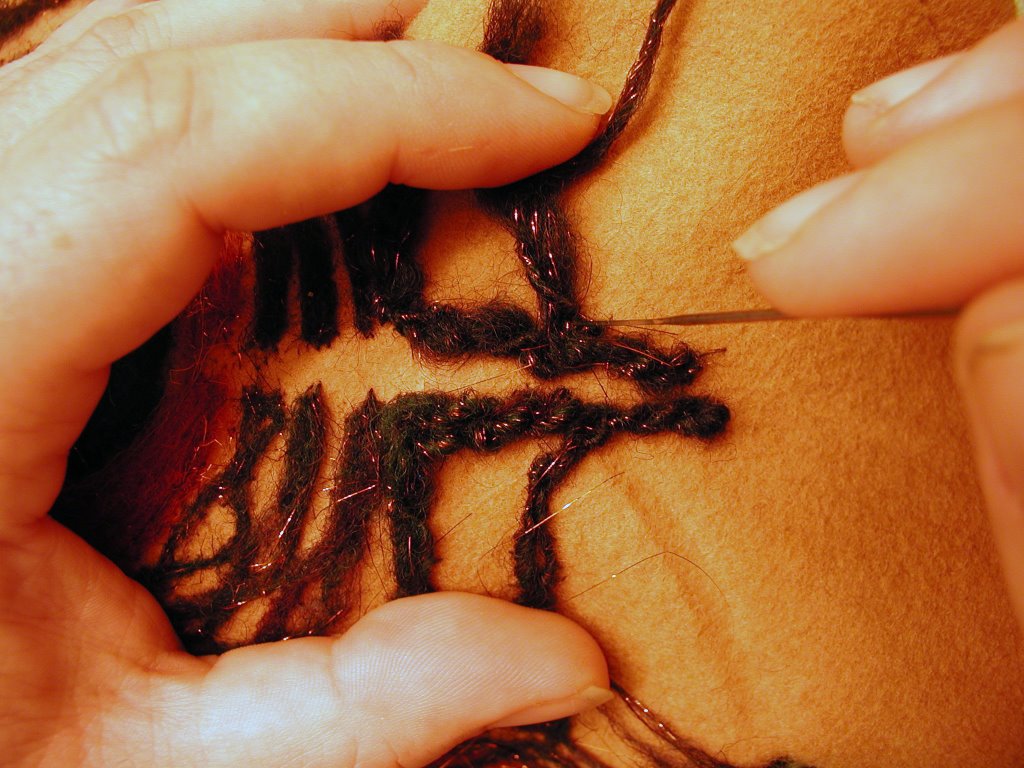
For much of the last month, I've spent most of my spare time making puppets for Sprout using recycled wool sweaters. Once the basic puppet is stitched, I needle felt features onto the puppets to finish them. Ms. Sprout now has quite the growing collection.

I've left several of the puppets at my local fiber shop so that the owner could show them off to her needle felting customers when they come in. To make a long story short, interest in the puppets has been such that I will be teaching a puppet making class at the shop in mid-November. I'm also researching the notion of putting several of the puppets into my Etsy shop. I'm having so much fun making them and Sprout just loves them. She carries on complete conversations with them and gives them hugs and kisses. I love the needle felted eyes because it is so wonderful to have a puppet with no plastic parts. Because the eyes and noses are felted on with a felting needle, they're more difficult to pull free than even the "childproof" eyes recommended for young children.

I'm never quite sure what a puppet is going to be until I've stitched the muzzle shut and played with it for a minute or two. Once I know what kind of animal the puppet wants to be, then I can cut ears, which serve to underscore the identity of the animal. With the ears cut out, I can stitch them into shape and pin them onto the puppet to try to capture the personality.

With the ears stitched on, then it's just a matter of selecting the wool for their eyes and felting on the finishing details. My favorites, so far, are the dogs. There is so much variety available. Whether the sweater that I'm working with is brown, purple, or red, if I can get the ears right, and the muzzle shaped the way that I want it, Sprout has a puppy to play with that doesn't need to be walked or fed.

04 October 2006

Birthday Update

My frantic search for spinable fibers in the deapths of my needle felting box yeilded a small section of Arlene's space dyed roving, precicely one ounce. I've been afraid to touch the handpainted roving I bought on Etsy until I was sure what I wanted to do with it. I figured that a lace weight, 2-ply yarn would be ideal but I'm still not sure whether I want to ply it back on itself or if I want to ply it with a solid contrast single.

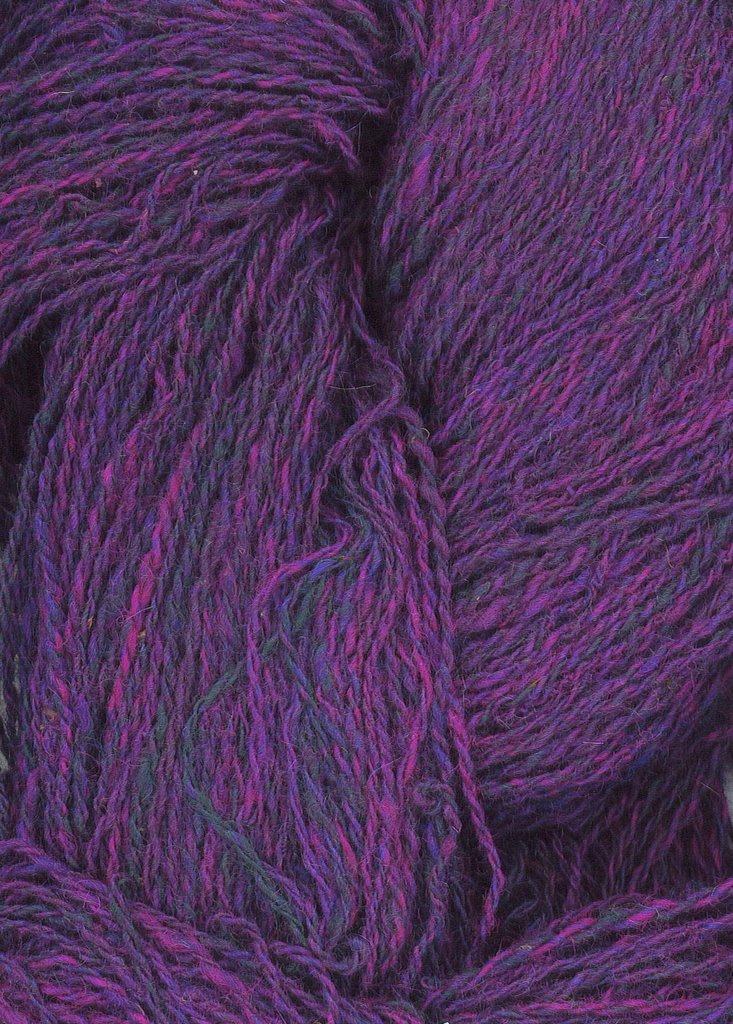
In either event, I knew that I wanted the final result to be somewhere in the 18 wpi range. The space dyed roving from my needle felting stash proved to be the perfect practice medium. Based on a little trial and error, it drafted very similarly to the handpainted roving. So, I pulled the space dyed roving apart , figured out how I wanted the color repetitions to work for me, and began spinning onto two separate bobbins.

When I plyed the two bobbins, I had succeeded in spinning the two sections of the roving to within 6 inches of each other. (I love it when a plan comes together...) The result, shown above, is approx. 105 yards of 2-ply yarn. I wrapped the yarn 18 times around a size 10 knitting needle and it measured just a hair under an inch.

I'm actually really pleased with the results. All in all, I feel like it was a really great exercise and an excellent use of some fiber that I bought to add to the felting stash with no clue how I wanted to use it.

02 October 2006

What can I do with...

I just finished plying approximately 183.75 yards (3.4 ounces) of handspun yarn. It started as a beautiful brushed sliver with blue, purple, green and fushia. I'm still trying to get the tensioning right on the wheel so my singles were pretty tightly spun. A tight twist in the opposite direction during the plying actually resulted in a pretty balanced yarn. I'm guestimating (I lifted about an inch worth of fibers from the skein and measured/counted it...) it at roughly 17wpi which would make it a fingering weight yarn. It may, however, bloom some when I soak it in hot water to set the twist so I'll probably re-measure the length and actually wrap some along a pencil or dowel to get a more accurate wpi measurement.

My friend H. is coming into town on Friday so I can pick her brain for ideas about what to make when I see her this weekend. (Consider yourself warned, H.)

It should be an interesting weekend. I'm having a birthday party on Saturday which I seem to have gone out of my way to sabotage. I don't remember when the last time I had a birthday party was. It's easy for me to blame K. for my reluctance to have parties because he's not the most social creature. The truth is, however, that if I wanted to have parties he'd indulge me in that as he does in almost every other way. (He won't let me start smoking again, but really who could blame him and I guess that I'd rather spend the money on spinnable fibers since I really only miss it when I want something to do with my hands.) I don't have parties because I become paralyzed by anxiety at the thought of preparing for a party and no one showing up. On some deep level I'm absolutely certain that no one really likes me or wants to spend time with me. Rather than face the rejection, I don't have parties, or (as I did this time around) I do something stupid to sabotage them like procrastinating on the invitations until everyone has already made other plans.
I'm sick... I need help... Maybe I should find something to do with my hands other than letting them loose on a keyboard to dump the unfiltered contents of my brain into my blog.

What's distressing me at the moment is that my spinning options right now are pretty thin... I didn't think to grab the fiber that I bought from Arlene after my drop spinning lessons so I can't spin that. Of the fiber I bought at Wool Gathering, I've spun everything but the natural black corriedale that I still need to wash the chocolate milk out of. (My beloved put the bag containing the roving on the floor under the car seat. Somehow - we won't point fingers or anything - a bottle of chocolate milk ended up being dropped into it nipple pointing down...) the other options are some beautiful handpainted roving that I bought on Etsy and recieved last week or a fiber sampler that I listed in my Etsy shop and now am really wishing that I had kept it for myself so that I could play with it...

For now, I think that I'll try to distract myself by needle felting features onto a hand puppet that I need to get out in the mail. Who knows, maybe I'll find something spinnable in my needle felting fiber case. I'm afraid that I may have a bit of a problem here... I just love the rhythm of spinning.

01 October 2006

BLOGTIPPING: October 2006

Given my current fiber obsession, I figured I'd focus my October blogtipping post on a handspinner. If you're not familiar with PippiKneeSocks.com I'd strongly recommend a visit.

I love the color sense represented by this site and the accompanying blog. The clean lines of the site combined with the dusky purple and green color scheme really serve as a soothing backdrop and manage somehow not to clash with even the most exuberant yarns posted to the site or the blog.

The availablity of tags for the blog posts makes it so much easier to find posts on the specific topics that I'm interested in at any given moment. I would love to invest the time and energy to read the entire back archive of the blogs that I stumble across either through posts in forums or through random web searches. Unfortunately, I don't have time to read and follow the forums I'm subscribed to and can't remember when I last managed to read a book so it's nice to be able to read selected highlights from the archives on topics that I'm particularly interested in of a moment. That ability keeps me coming back to the blog and encourages me to hit the subscribe with bloglines button on my tool bar. I wish every blog had tags... Which reminds me, I need to get my own tagging system back online. I'm in the midst of yet another computer migration and haven't made a point yet of pestering tech support for assistance in that area.

I love the eye candy. Pippi takes beautiful pictures and spins beautifully. The combination is inspiring to a novice spinner who does neither very well.

Which brings me to the tip portion of my blogtipping post... I'd love to see a photography tutorial for those interested in photographing their handspun. Whether the pictures are intended for use on a blog, ebay, or etsy, there are a lot of bad pictures of good yarn out there and I think Pippi may be just the person to change that.

Other sites that I'm looking enjoying (in part because of the usual acquisative frenzy of consumerist lust that comes with trying to answer the question "What do you want for your birthday?") right now are:

KnitPicks.com both their needle collection and some of their yarns. (They have an amazing collection of undyed yarns... Just what I need, another fibery obsession...)

Brainsbarn Custom Wooden Crochet Hooks are absolutely beautiful. Sometimes, beautiful tools make the work more enjoyable. I have some stunning handmade pottery tools that are a pleasure to use. I can only imagine how much one of these beauties would enhance the experience of creating crochet lace.

And, on that note, I think that I need to turn off the computer and spend some quality time with my baby and her daddy. They really are what's important in my life and I wouldn't want to get too carried away with my materialist day dreams.

21 September 2006

My kingdom for a niddy noddy

It's hard to describe how rewarding it feels to have made my own yarn on my spinning wheel. The fiber is CVM (California Varigated Mutant) roving that I picked up at Wool Gathering. I had about 4 ounces to play with and absolutely loved spinning it up. I'm still getting the hang of adjusting the tension so that it winds onto the bobbin. And, speaking of the bobbins, I didn't do very well at getting the amounts on the two bobbins equal. I haven't had much luck with Andean Plying and the Handy Plying method from KnittySpin is not going so well for me yet either. Since there's not much left on the bobbin, I'm debating either plying it with thread and using it as an accent somehow or using it as an opportunity to learn how to handle singles. It's all about the learning experience.

And, speaking of learning experiences... I don't, yet, own a niddy noddy. This invaluable piece of spinning equipment enables you to wind your finished yarn off the bobbin and turn it into a skein. I have a very limited number of bobbins and/or drop spindles (although I'm making myself more of the drop spindles to play with so that won't be as much of a problem) so the products of my spinning efforts must go somewhere. Although the quality of the image above leaves much to be desired, the yarn is obviously in the form of a skein. Obviously, I've come up with a solution. In the spirit of sharing, I thought that I'd post my (temporary) solution here in hopes that it will help someone else... If you combine a CD drop spindle and my improvised solution to the niddy noddy problem, it is actually possible to begin spinning for almost no capital investment beyond the fiber itself.

Looking at the image above, you see a rectangle. This rectangle is intended to represent a hardcover book, although any rigid, rectangular object will work. (I just happen to always have a book at hand, and there was one there when I needed it so that I could unwind my yarn and free up my drop spindle for the next project.) The illustration should help, the rectangle is supposed to be translucent so that you can see how the yarn wraps around the back as well as the bold pink lines that show how it wraps on the front. The pointing fingers show the path of the yarn around the front of corner A, diagonally across the back to emerge and go around the front of corner B. The yarn then goes around the back of corner C and diagonally across the front of the book and around the back of corner D. This should bring you to where you started, in the middle of the short side of the book, to wrap around the front of corner A and repeat that path until you're out of yarn. It is a kind of elaborate figure-8 which allows you to wind the yarn around, and around, and around the book. Once you've finished, you can usually slide the yarn off one corner without too much difficulty.

20 September 2006

Taking the long way

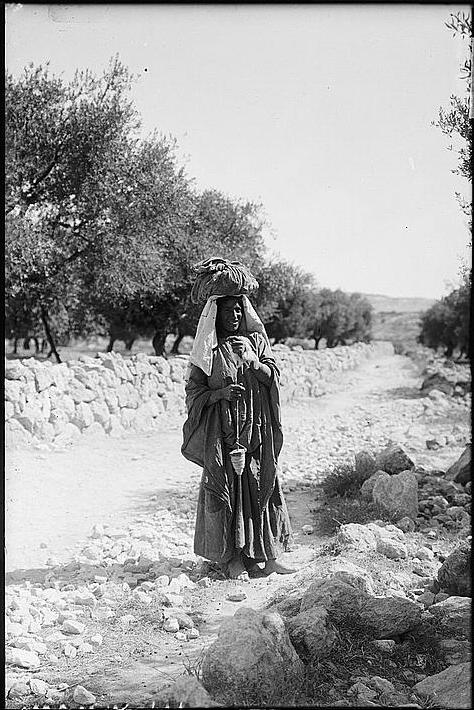
As a student in art history, I developed an interest in artifacts from Neolithic and bronze age civilizations. That interest is a large part of the reason that I started making ceramic beads and small vessels. Most of what we know about these ancient civilizations is based on the items (most showing exquisite workmanship considering the primitive tools available to them) found amongst burial sites. Some of the most common artifacts are spindle whorls. The spindles themselves, the shafts attached to the whorl around which the fibers were wrapped, were generally made of wood and have long since disappeared. The whorls, however, were often made of clay, stone, bone, or other materials. Many were carved with elaborate decoration. A favorite spindle was a treasured possession.

I'm not sure when I realized what these spindle whorls signified. If recorded history is any indication, spinning was generally women's work. Every thread in every garment was spun in more or less the same way and passed through the fingers of a woman before being wound onto a spindle. Textiles were precious and were, almost exclusively, the domain of women. As such, spindle whorls were vitally important.
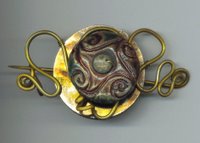
Soon after I came to these realizations, I decided that I wanted to learn to spin. I began making beads intended to serve as spindle whorls and even tried (unsuccessfully) to teach myself to spin. On some level, I guess that I believed that learning to spin would connect me with all of those women throughout history who spun during otherwise idle moments to produce the threads that clothed their families.

My own work in textiles has been sporadic at best. I constructed a backstrap loom and learned to weave as part of an art education class that I took in college. I learned to crochet when I was young and have picked up the hook and put it back down many times over the course of my life. I learned to knit in a DoDDS elementary school in 1976 long enough to knit a small acrylic flag for a school project. (The stars on the flag were not knit. They were actually made with gummed foil stars that were glued to the blue field with the foil side facing down.) I promptly forgot whatever knitting I'd learned and didn't try again until about two months ago.
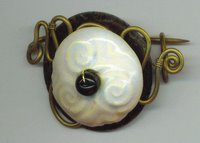
About a week after purchasing my first set of knitting needles and taking a knitting class taught by a friend of mine, I asked the owner of my favorite fiber store if she would be willing to teach me the fine art of spinning on a drop spindle. I'm pretty sure that my life will never be the same. I've been spinning for almost two months now. I have a beautiful spinning wheel which offered me the opportunity to learn about the parts, mechanics, and intricate workings of the wheel before I'd even had a chance to spin my first yarn. (A design flaw in the original footman resulted in a break, either while I was transporting it or at some point before it came home with me... The footman had previously broken in the same place and had been repaired. It was now time to replace it which became an unexpected opportunity to re-design the footman.)

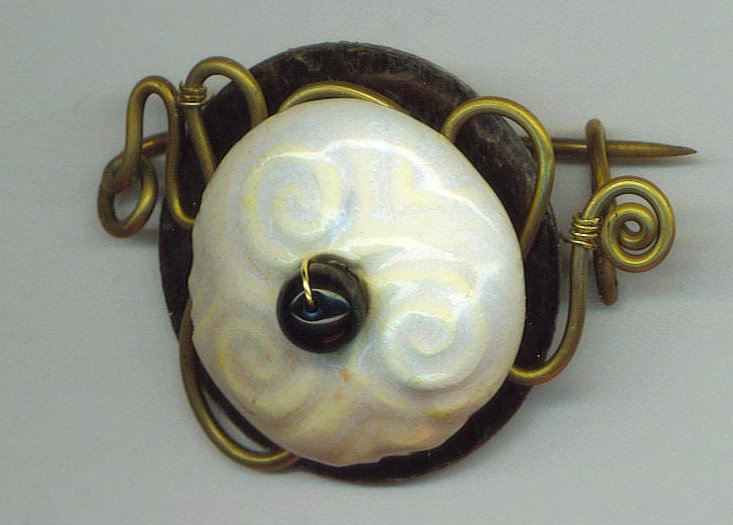
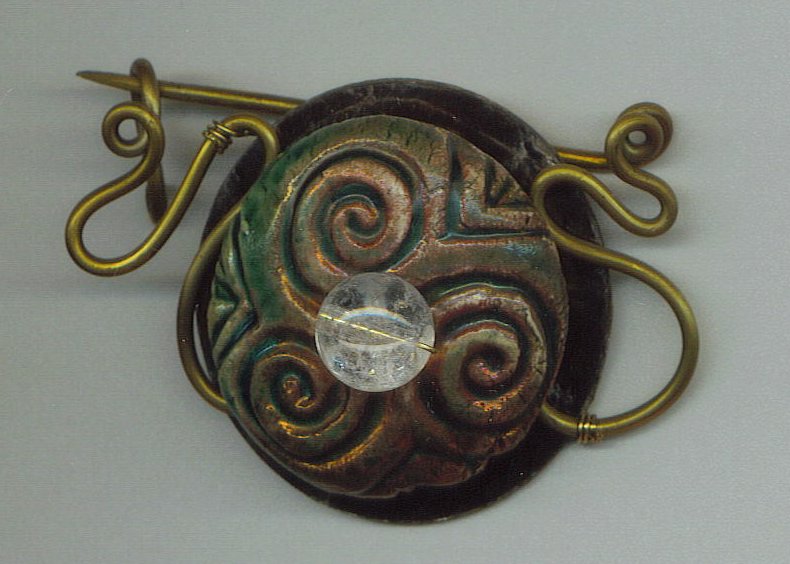
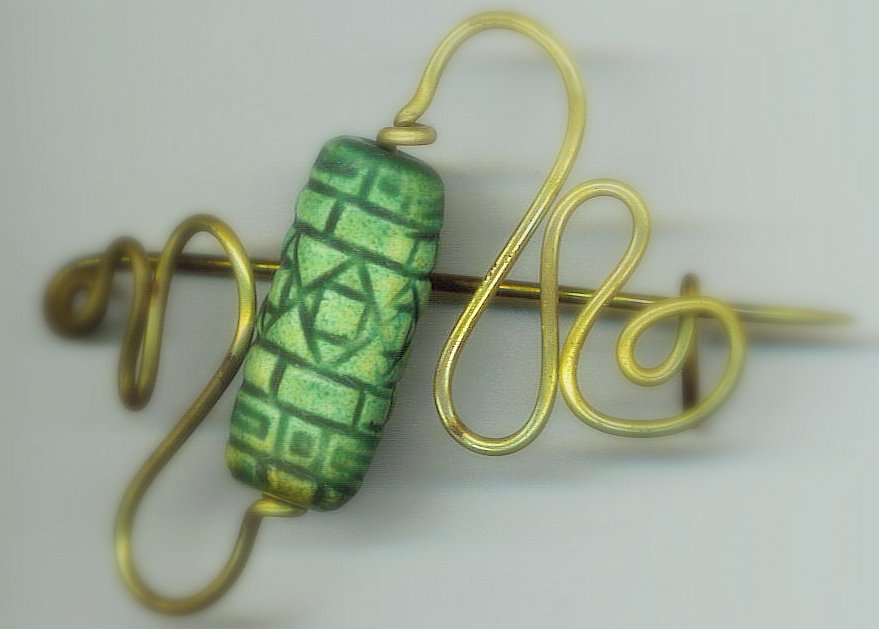
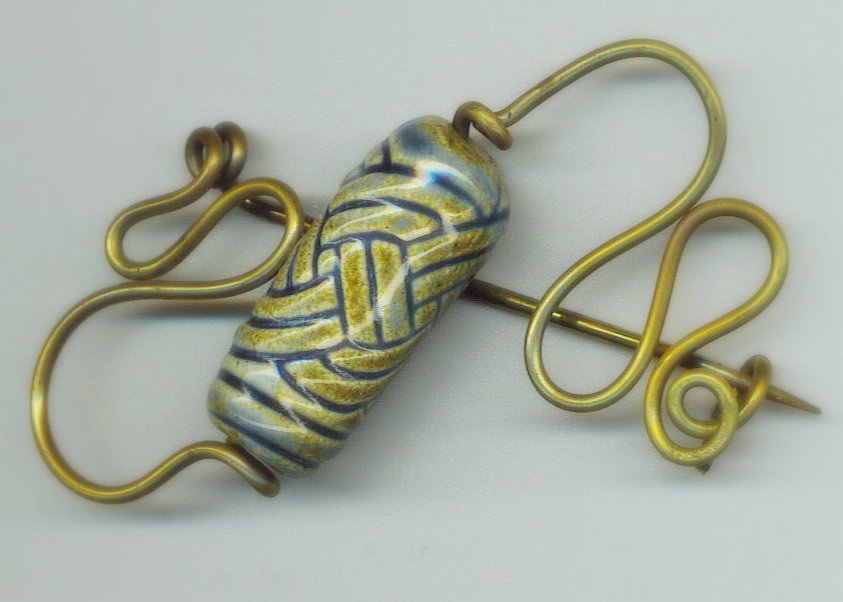
Between spinning and knitting, my interest in fiber and the textile arts has gone from a mild curiosity and occasional hobby to an overwhelming obsession. Since those interests were what motivated me to start making the shawl pins again (combined with the self-doubt that grew from an interpersonal conflict that I've already wasted too much time re-hashing here) it seemed only natural for me to renew my acquaintance with spindle whorl motifs and begin to produce focal beads based on them.
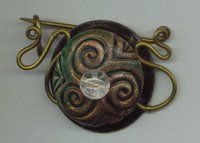
I've already uploaded a couple of my new spindle whorl shawl pins to my Etsy Shop. I'll be uploading more as time permits. (Life with toddler has a way of impressing upon you the things that you **MUST** do vs. the things that you'd like to do.) The process of making them is actually a bit of a departure for me. After carving the spindle whorl beads, I made press molds of them. I've made press molds in the past with varying degrees of success but don't always enjoy using them because I like the intimate connection with each piece that I make. Since one of my goals for my shawl pins has been to keep them as affordable as possible, I wanted to press mold the spindle whorls to reduce the labor and keep the cost down. I used a simplified variation of the technique used by Melanie at Earthenwood Studio. Once the individual beads have been press molded, I refine the carving a bit to clean up the lines and ensure that they don't have a "stamped out" appearance. The result is that each of the beads has its own character and individual feel to it from being hand-worked but I'm not investing several hours in each of them. It feels like a good compromise.

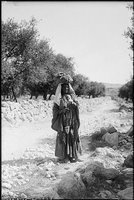
IMAGE SOURCE: Woman, possibly Bedouin, holding spindle, standing in road [Stereo glass plate taken between 1898 and 1946]Taken either by the American Colony Photo Department or its successor the Matson Photo Service. Gift to the Library of Congress from the G. Eric and Edith Matson Photograph Collection

15 September 2006

Whiplash: Needle Felt Embellished Hat Entry


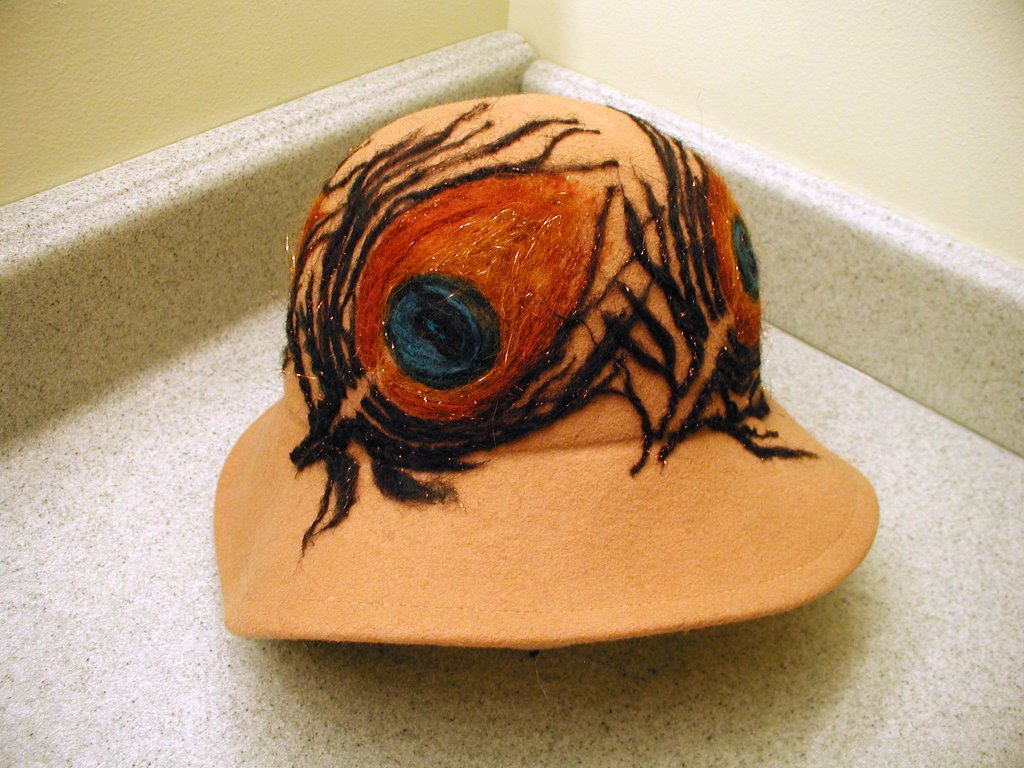
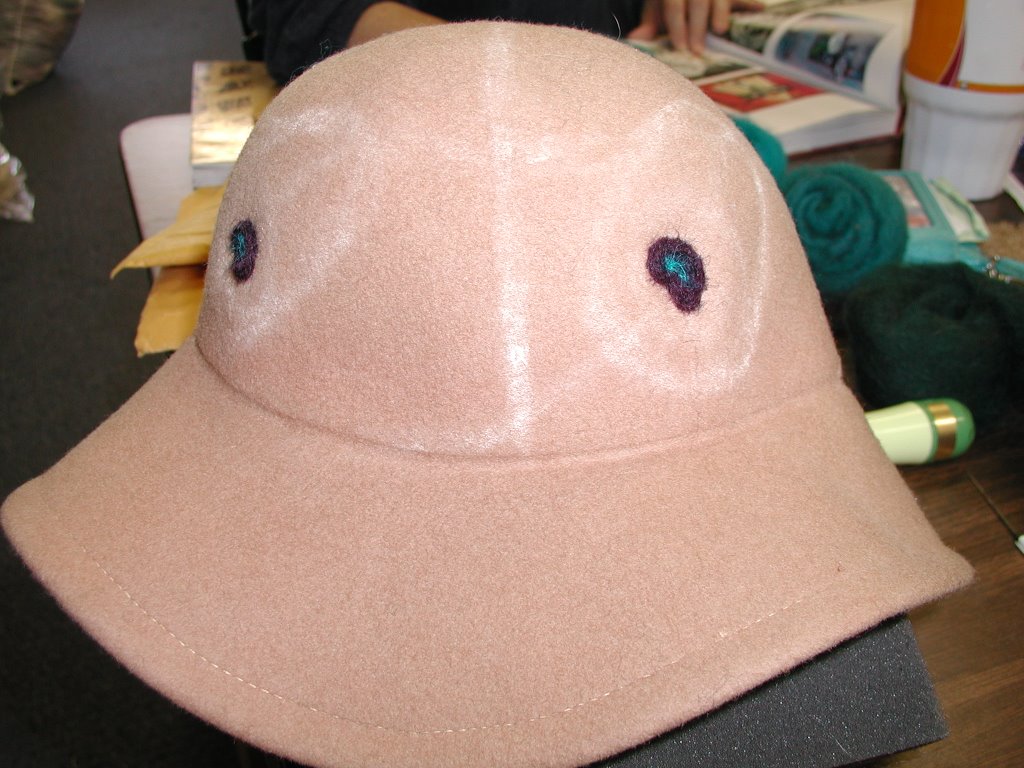
whipupThis is my first time actually trying to enter Whiplash. I'm not sure if which ring of the competition to throw it into. It's also my first attempt at a needle felting tutorial. The first step, of course, was to obtain a hat. This one was a $1 find at my local thrift shop. The hat was in mostly good condition but had a minor stain and a couple of small holes, presumably from someone attaching a pin to decorate the hat. For my purposes, none of those defects really mattered. (Unfortunately, I neglected to take any pictures of the hat before I started embellishing.)

After figuring out what motif I wanted to use to decorate my thriftshop find, I located the defects on the hat that I wanted to hide. I sketched my design onto the hat using chalk, placing the eyes of the peacock feathers over the holes that I wanted to felt over. I selected colors of corriedale roving needed to complete my design and began filling in the eyes of the feathers as though coloring a paint by number. I found that the chalk outlines disappeared rather quickly once I started the actual felting process. That didn't really matter much, however, because the lines were only intended as a guide for placement of the eyes and the rest of the feather was built more or less free-form around the eyes.

Once the eyes were finished, I decided that the hat needed a bit more glitz. for the remainder of the feathers, angelina fibers were carded into the roving to add sparkle to the finished project. This picture shows the hat with the blended rolags of the two brownish tones that I selected for the tops of the feathers. In the foreground you can see the clover multi-needle punch and a single needle that I used to attach the fiber to the hat. For tacking fibers in place, I generally keep one or two felting needles in each size with a self-adhesive label wrapped around the top. On this lable, I can write the size and shape of the needle so that I can tell at a glance which needle I'm reaching for. Many manufacturers color code their felting needles, but I can never seem to remember which color corresponds to which size/shape.

I also selected several colors from the eye of the feather and carded them together with the angelina fibers for the "fronds" of the feathers. I hoped that by blending the colors, I would be able to mimic the irridescence of the play of colors on the feathers. To make the fronds, I started by pulling out thin tufts of the blended fiber and rolling it between my hands to make a thin snake. I then arranged those snakes into the pattern that I wanted. After some experimentation, I also found that I could spin (I needed the practice drafting on my spinning wheel) a thick/thin single which I could then pull apart in the lengths that I wanted. Since my spinning is still a bit rough, the overtwisted lengths of fiber kinked back on themselves in a way that I found pleasing and felt contributed to the overall design.

For those not familiar with needle felt embellishment, you begin by arranging the fibers onto the base fabric. It's a little like painting with the fiber. Once you're pleased with the arrangement of your colored fibers, you tack them into place with a single needle. A felting needle is very sharp and usually has either a triangular or "star" shaped cross-section. This cross section creates "blades" on the needle which have tiny barbs arranged along their length. The barbs grab the fiber and push them through the base fabric. To use the needles, you support your base fabric on a block of foam and push the needle through the fiber and base fabric into the foam pushing the loose fibers through at the same time. For this hat, I found that a "Nerf" football followed the contour of the crown of the hat better than the block foam that I had been using and I was able to work much more effectively without jabbing myself in the fingers with the needle as often as I had done with the square block.

From this point, the entire process can be done either with the single needle, or with a variety of multi-needle punches. The punches certainly make the process go much more quickly.


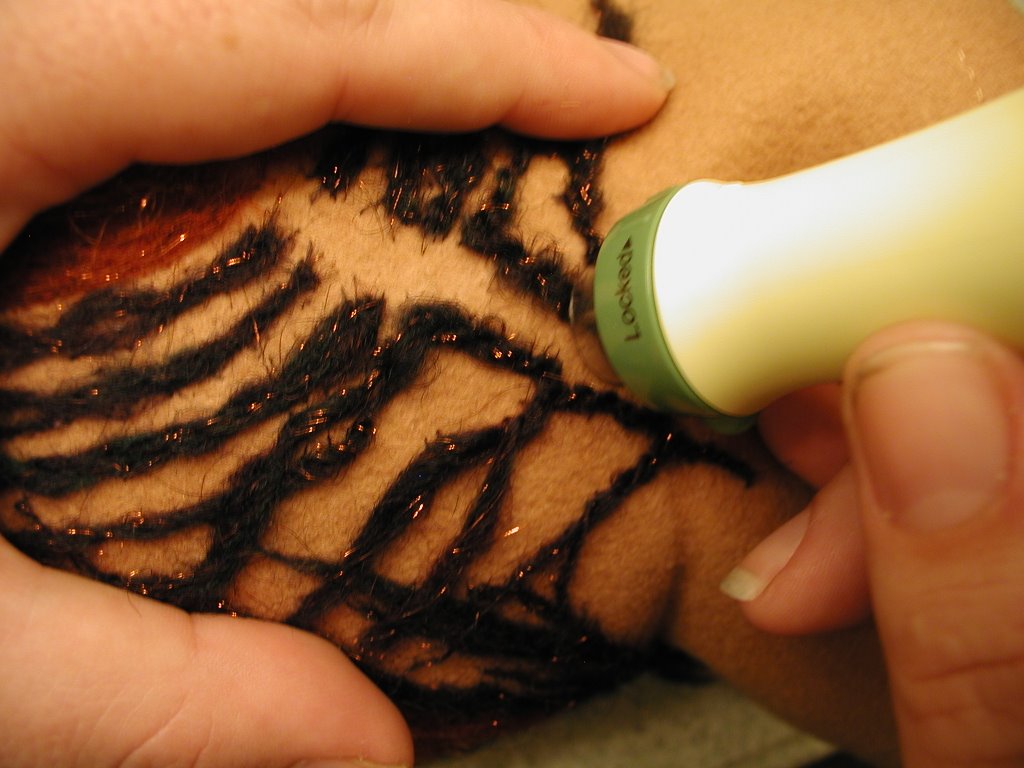
My current favorite punch is the clover multi-needle punch. It holds 5 needles and has a plastic guard which locks when the punch is not in use. The guard also protects your fingers so that you don't perforate them while you work. Once the fibers have been tacked down, the punch makes the actual work of securing the fiber to the base fabric go much, much more quickly.

12 September 2006

An' The Wheel Goes 'Round

I mentioned in an earlier post that I'd recently learned to spin on a drop spindle. What I didn't mention was that I was also the recipient of a beautiful Country Craftsman spinning wheel. The wheel, she hasn't told me her name yet, came to me with a broken footman. After looking closely at the point of failure on the original part, I realized that it had broken at least once before in the same location and had been repaired.

The first thing that I did was to research Country Craftsman wheels in an effort to find a stock replacement. What I found was that these wheels were made by hand by a woodworker in Massachusetts for something like 25 years before he retired a couple of years ago. Needless to say, replacement parts are not exactly growing on trees.

In retrospect, I find that I'm actually glad that I wasn't able to get a stock replacement. I quickly decided that what I needed to do was to find someone to re-make the footman. I took measurements from the original, studied how it fit onto the wheel and how it worked, and took matters into my own hands. I created an Alchemy request on Etsy.

If you're not familiar with Etsy Alchemy, you're not alone. It is a system set up by the wizards at Etsy to connect buyers with artisans/craftspeople who can fulfil their makery wishes. It's also a little confusing. First, the buyer posts an alchemy request saying what they want. They include pictures or links to help clarify their needs. Then one or more Etsy artists bid to fill the request, supplying their own pictures or other information. Then the buyer chooses a bid (or several bids) and from there the commissioned work is completed, paid for, and feedback is left. It is a wonderous and magical process.

In the case of my footman, I got one bid from a woodworker in Canada who I'd corresponded with earlier this year about custom pottery tools. Barry is a great guy and the two of us exchanged quite a few messages about measurements and tweeks to the design of the original footman. In the end, he recommended a footman made of 2 layers of maple laminated together with metal plates on either side of the keyhole opening where the footman attaches to the flywheel. We changed the dimensions of the footman, as well, widening it so that the holes do not come so close to the edges as to weaken the structure of the finished part.

My new footman arrived from Canada in Saturday's mail. In the last few days, have admired it, fondled it, shown it off to my spinning mentor, and finally, attached it to my spinning wheel where it will live until the end of time. With the new footman in place, I took the wheel for a real test drive. I spun up 1/2 ounce of leaf green corriedale wool that I had purchased for a needle felting project. My thought, when I started spinning it, was that I would pull it off the bobbin and allow it to relax so that I could use it as vines for my planned needle felted embellishment. Now that it's spun, however, I can't decide whether to go with the original plan, or to ply it back on itself and save it as a momento of my first real yarn spun on my very own spinning wheel. For now, I'll leave it on the bobbin where I can admire it while I work on glazing beads for this weekend.

Expect some fun fiber posts over the next week or so... A tutorial, a long overdue explanation of my spinning fascination, more images of the large wavy motif in progress, and maybe even some yarn, assuming that I get my clay work done. Wish me luck finding the time that I'll need over the next three days.

Image: [Irish Spinner and Spinning Wheel. Co. Galway, Ireland] Found via Library of Congress online collection. REPRODUCTION NUMBER: LC-DIG-ppmsc-09892 (digital file from original) No known restrictions on publication. photomechanical print : photochrome, color. [between ca. 1890 and ca. 1900].

08 September 2006

More Studio Stuff

I spent some time today listing new pins in my Etsy shop. Tonight I'm bisque firing the stuff that I made to replace the items that I lost in last week's explosive firing. (I should try to take a picture of the debris inside the kiln before I clean it up but I doubt that I'll bother.) I'm really very excited about the pieces that I'm working on. I'm practicing my carving skills and making press molds which will keep the finished pieces as affordable as possible.

I'm still working on the needle felted project that I posted about yesterday. In addition, I'm about to start a needle felted hat. I found a beautiful wool hat for $1.00 at a thrift shop. I'm going to embellish it with needle felting and take photos at each stage of the process. I'm thinking that it will work up into a fun tutorial. If I get my act together, I may be able to have it finished in time for the Whiplash deadline since the September theme is Hats.

My other big project right now is that I want to re-write my artists' statement. It's probably because of my recent obsession with fiberarts but I've got all of these philosophical points running around in my head about "Women's Work" and the whole Art vs. Craft debate and what gets called "craft" and the value placed on crafts as opposed to "Art"...

I'm sure that reading statements from clothing designers, weavers, and other textile artists talking about their struggles to have their work accepted into galleries and validated by the "establishment" has influenced my thinking about all of this. It's just interesting to me that since I've decided to turn my attention more toward incorporating my beads into finished objects that compliment my interest in fibers and textiles, I've acquired a broader perspective with which to view the Art v. Craft groupthink.

However, if I find myself too tempted to indulge in pointless woolgathering, I just remind myself that I have a show to prepare for next weekend, and beads/pins to make.

07 September 2006

Catching up on Studio Stuff

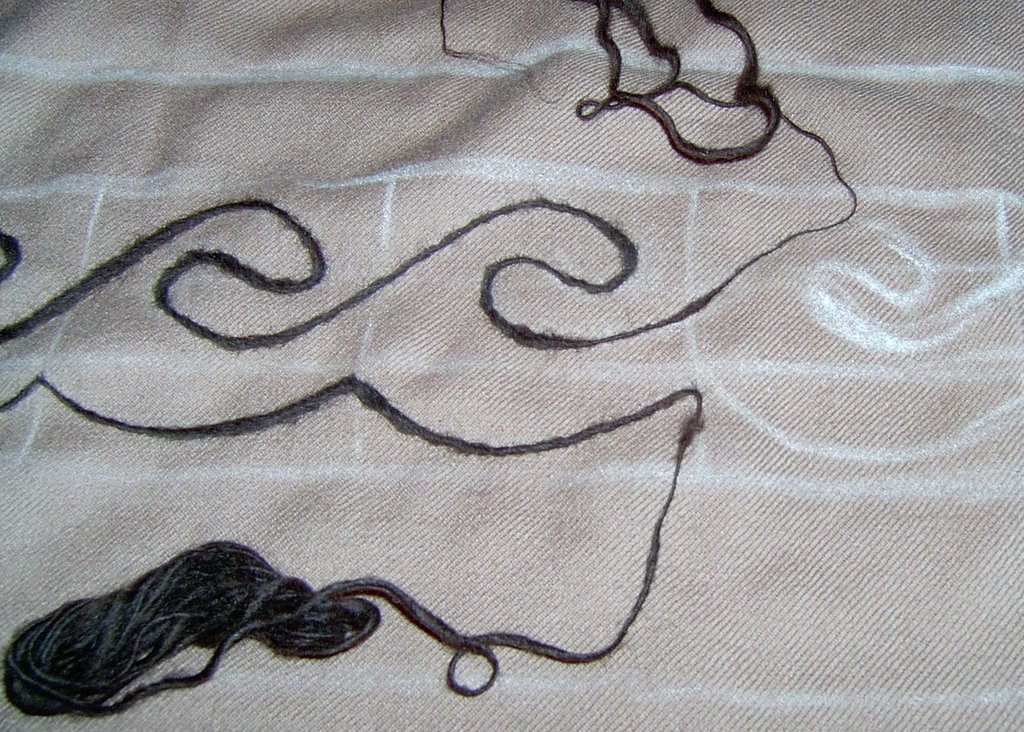
The image at left is of a needle felting project that I'm currently working on. This is actually very early in the project. After choosing the colors for the piece, I spun a thick/thin single on a drop spindle and then pulled it off into mini hanks. I've drawn the motif that I want to felt onto my base fabric in chalk. With the spun single, I'm tracing the outlines of the motif onto the fabric and tacking it down. I start with a single needle to tack the fiber in place. Once I've got it laid out in a section, I switch to the clover multi-needle punch. (Link is to a tutorial from Betz White which features this wonderful tool...) Once the section is well secured with the clover tool, I then take it to the needle felting machine which gives the whole piece a much better work out than I could by hand. The one thing that I'm learning from working on larger projects is that if I'm going to do larger projects (like the Ruana, embellished clothing, shawls, wraps, etc) I need bigger guns...

I'll be posting more images of this as I get closer to completion. I'm looking forward to talking about the inspiration for the project and the source of the motif. But it will just have to wait a little while. I've got a lot going on in the studio right now, and I'm trying to get ready for my first fiber festival. ***Sigh***

I have several blog entries that I've written and saved as drafts over the last few weeks. Most of them are about depression and therapy and will probably never see the light of day. It's not that I'm particularly depressed at the moment, I'm in about the same place that I've been for the last few months. Therapy seems to be working out well for me. I still haven't decided whether I'm ready to try a higher dose of my medication yet. I'm just not sure if the problem is the dose or the medication and I don't feel like I know how that determination will be made. I have a vague fear of gradually climbing doses until I experience adverse side effects and then have to start the whole process again with a new drug. (I suppose that this is something that I should talk to my psychiatrist and/or therapist about... how odd that because of modern American insurance these are two different people...)

My therapist has given me a homework assignment. I have been instructed to get to work, and that's just what I'm trying to do. Part of it is going out to the studio every day to get something done whether I get my hands dirty or not. I haven't quite succeeded in getting out there EVERY day, but in the last 2 weeks I've only missed 3 days, so that's progress.

I did get a little caught up in the idea of having results to show for my efforts and loaded a kiln full of bisque that I ***KNEW*** wasn't dry. I thought that I was being so clever by setting the kiln on its lowest setting for an extended soak. The problem is that even on its lowest setting, my little kiln gets hot, Hot, HOT!!! The moisture in the clay turned to steam before escaping the pieces and the pressure of all of that expanding water created quite a mess. This is the real cause of explosions in the kiln... Air bubbles don't cause them, it's the moisture trapped in those air bubbles that is the real culprit. I'll have to vacum shards out of the element coils before I can fire any of the stuff that I've made since the explosions. (yes, plural, I lost several items because I was in such an all fired hurry...)